*This article contains some promotional material.
Filmora13のAIポートレート機能の使い方まとめ
In this article.Filmora13This section explains how to use the AI portrait function of the
Filmorain order toFull 30-day money back guarantee from purchase.So, you can try it out risk-free.
If you actually try Filmora and don't like it, just send a simple "Please refund." via the contact form on the official website and you will receive a full refund.
Filmoraalso offers discount campaigns from time to time.For the latest discount information, link belowPlease check it out from the following page.
↓arrow (mark or symbol)
Click here for the official Filmora website
30-day money-back guarantee now!
Filmora13(フィモーラ13)のAIポートレート機能の使い方
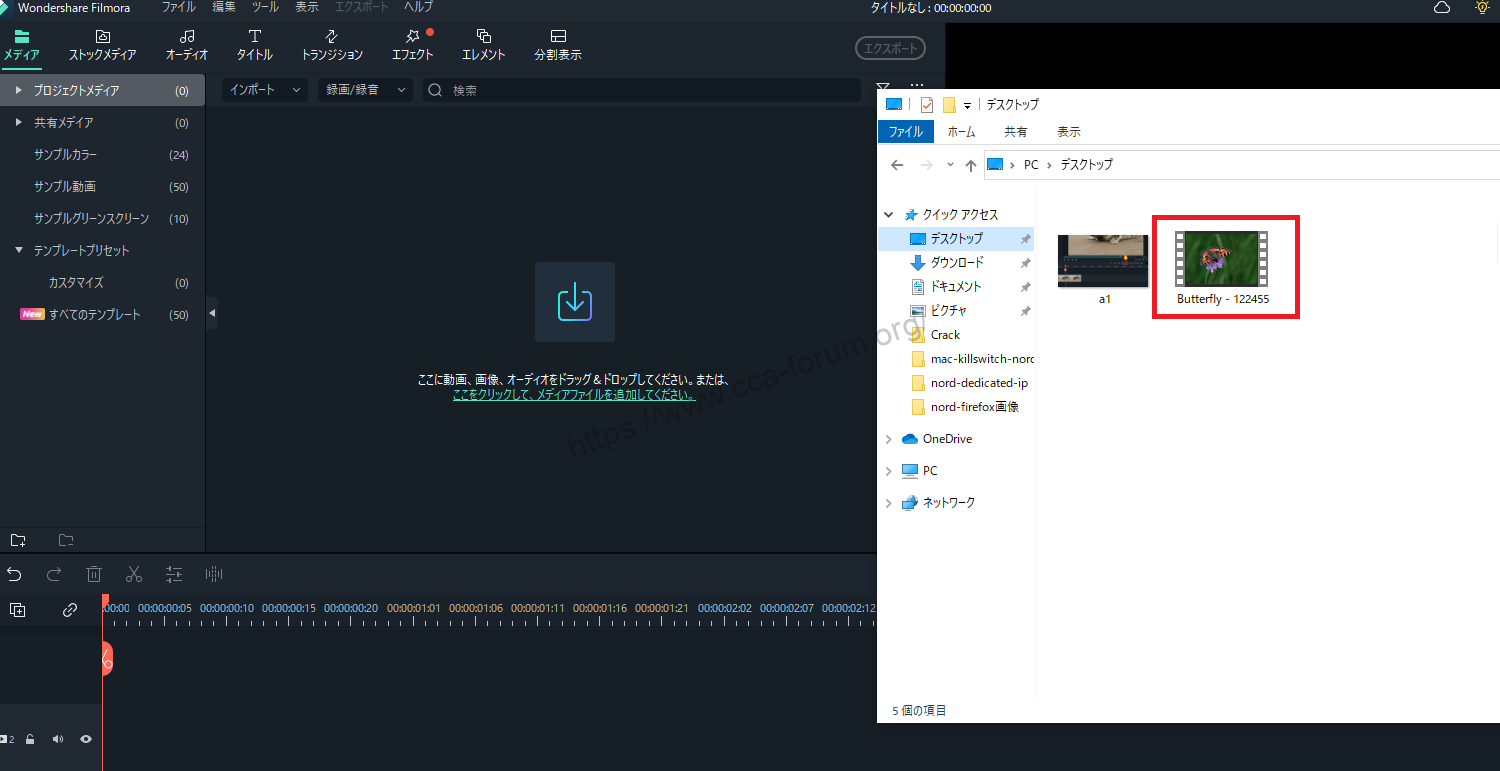
Select the file you want to add from the folder
Select the file you want to add from the folder.

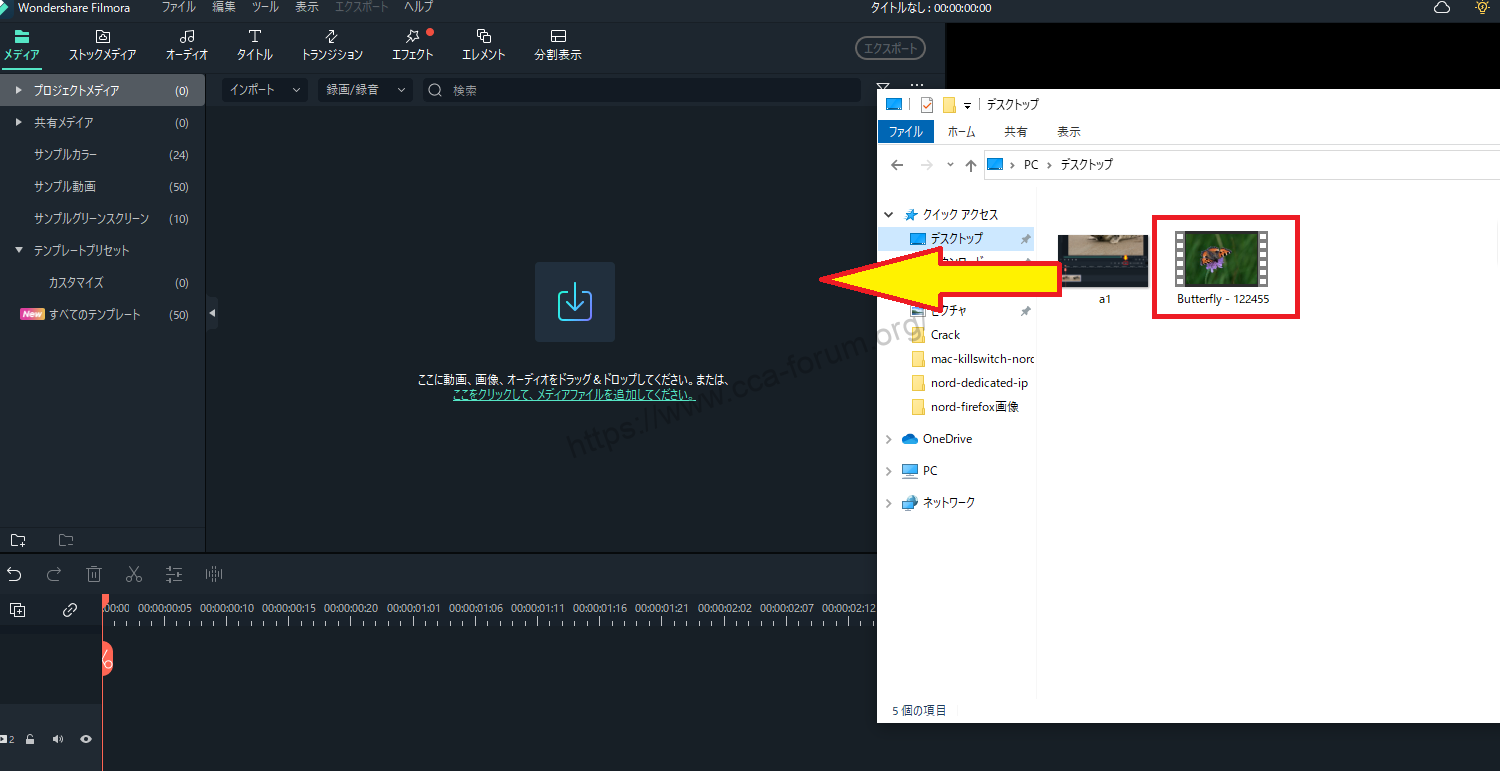
Drag and drop into Filmora's media area
Select the files you want to add from the folder and drag and drop them into the media area of Filmora.

Select a file and add it to the lower timeline view
Select the file you just added and add it to the lower timeline view.

Select [Effects
Select [Effects].

Select [Effects] and click [AI Portrait
[Select "Effects" and click "AI Portrait.

Once the AI portrait effect is determined, drag and drop it onto the timeline
Once the AI portrait effect is determined, drag and drop it onto the timeline.

Preview the applied AI portrait effect
Play the video to see the effect.

Multiple AI portrait effects can be added to a clip by dragging and dropping them onto the timeline.

Adjusting AI Portrait Effects
Adjust the AI Portrait Effect settings for best results.
Double-click an AI portrait effect dragged and dropped onto the timeline
Double-click the AI portrait effect that you dragged and dropped onto the timeline.

Double-click [AI Portrait Effect] and adjust the AI Portrait Effect settings.
Adjust the AI portrait effect settings.

Fade and Opacity:Adjusts the fade and opacity of the effect.The range is from 0% (no effect) to 100% (portrait may not be recognized).
Edge width :Indicates the width of the edge. The smaller the value, the narrower the width; the larger the value, the wider the width.
Feathering: Indicates the blurring range of the edges of the portrait effect. The higher the feathering value, the blurrier the edge.

Click "OK" when AI Portrait settings are complete.
Click "OK" when you have finished setting up the AI portrait.

Here we have added the AI portrait effect to the video.

↓arrow (mark or symbol)
Click here for the official Filmora website
30-day money-back guarantee now!
summary
この記事では、Filmora13(フィモーラ13)のAIポートレート機能の使い方について解説しました。
Filmorain order toFull 30-day money back guarantee from purchase.So, you can try it out risk-free.
If you actually try Filmora and don't like it, just send a simple "Please refund." via the contact form on the official website and you will receive a full refund.
Filmoraalso offers discount campaigns from time to time.For the latest discount information, link belowPlease check it out from the following page.
↓arrow (mark or symbol)
Click here for the official Filmora website
30-day money-back guarantee now!